Setup Microphone in Windows 10
The first step is to plug the Microphone into computer (Wired Microphone) or connect Microphone to computer using Bluetooth (Wireless Microphone). Once Microphone gets connected to the computer, Windows 10 will automatically search and install the drivers required to run the Microphone on your computer. After the drivers are installed, you need to complete the Setup Process using the built-in Microphone Setup Wizard as included in Windows 10. Note: If Windows 10 fails to install the drivers, visit manufacturers website and download the drivers to your computer.
1. Connect Microphone to Computer
If the Microphone is wired, simply plug the Microphone into the Audio Port of the computer. In case of a Wireless Microphone, you need to follow the steps below.
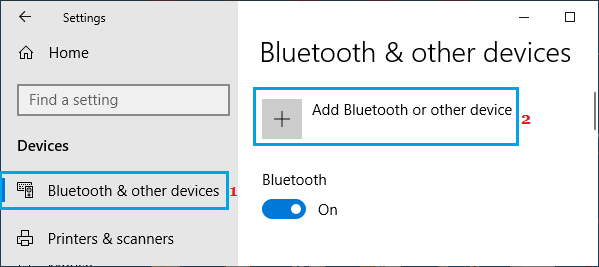
- Go to Settings > Devices > Bluetooth and other devices and click on Add Bluetooth or other device option in the right-pane.
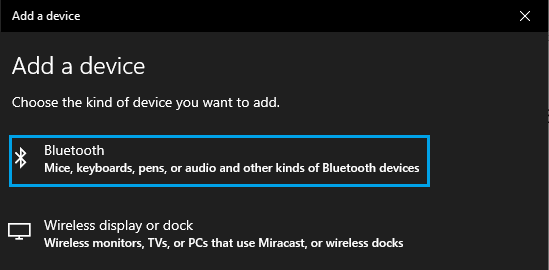
Note: Make sure Bluetooth is toggled ON. 2. On Add Device screen, select the Bluetooth option and wait for the computer to discover your Bluetooth Microphone.
Note: You may have to press the pair button to allow the Microphone to be detected. 3. Once the Microphone is discovered, click on your Microphone and allow Windows to install the required drivers.
- After the Microphone is added, click on Done to exit the screen.
2. Setup Microphone in Windows 10
If you are connecting the Microphone for the first time to computer, you need to complete the setup process.
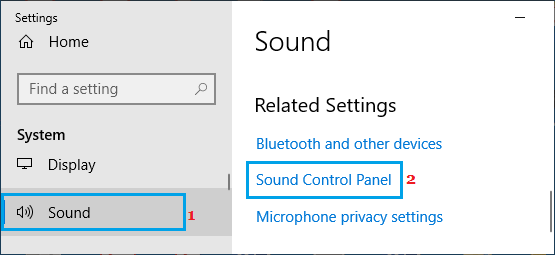
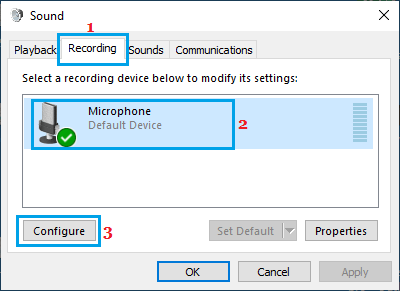
Go to Settings > System > Sound > scroll down in the right-pane and click on Sound Control Panel link under “Related Settings”.
On the pop-up, click on the Recording tab > select your Microphone and click on Configure.
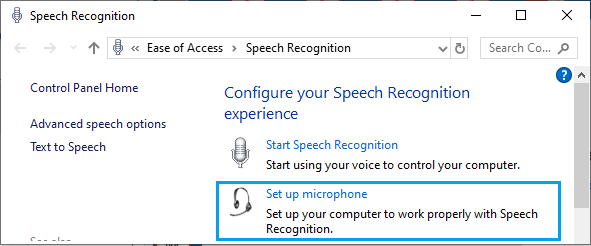
On the next screen, click on Set up Microphone option to open the Microphone Setup Wizard.
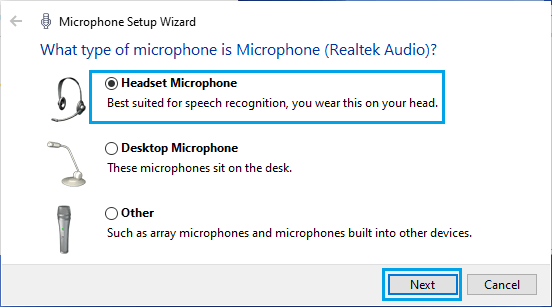
On Microphone Setup Wizard screen, select the Type of Microphone that you have and click on the Next button.
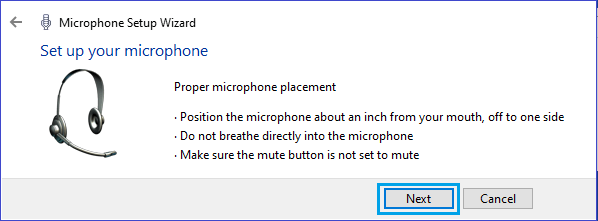
The next screen, read & understand the tips for using your Microphone and click on Next.
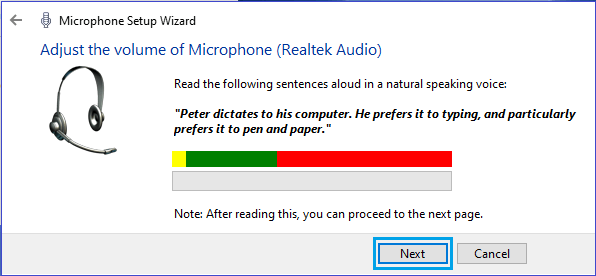
Next, read the displayed sentence in your natural speaking voice and click on Next.
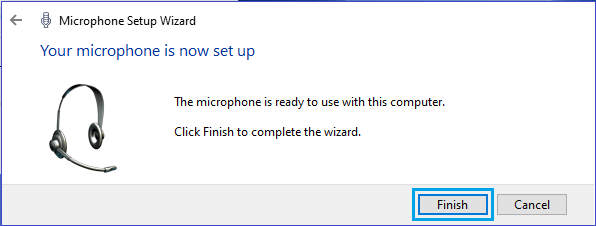
Click on the Finish button to complete the setup of Microphone.
If your Microphone did not hear you, either it was muted or your sound was picked up by some other Microphone. In such a case, you will have to repeat the above steps after unmuting the Microphone.
3. Test & Configure the Microphone
While you can start using the Microphone after completing the setup process, you may want to test the Microphone to make sure it is working properly.
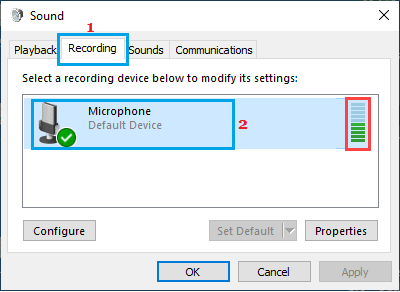
Go to Settings > System > Sound > scroll down in the right-pane and click on Sound Control Panel link under “Related Settings”.
Select the Recording tab > Speak in your natural voice and you should see Green bars rising as you speak.
If the recording device is not working, you won’t see Green bars. In which case, you may need to update the drivers and redo the setup process.
How to Fix Audio Services Not Responding Error in Windows 10 How to Fix Headphones Not Working Issue in Windows 10