Disable Skype in Windows 10
By default, all versions of Microsoft Skype are designed to start automatically with the computer and remain active in the background, ready to receive messages and calls on your computer. This standard behavior of Skype can be useful if you mostly rely on Skype for all your personal, work or business related calls and messages. However, if you do not use Skype or only use it occasionally, there is no point in allowing Skype to uneccesarily waste resources on your computer by starting up with the computer and remaining active in background. Users have reported 3 known versions of Skype and all these versions can be disabled by going to App Settings and also by going to Privacy Settings on your computer.
1. Disable Skype Using Privacy Settings
Depending on the type of Skype Installed on your computer, you may or may not find Skype apperaing in Privacy settings on your computer. Go to Settings > Privacy > scroll down in the left-pane and select Background Apps. In the right-pane, scroll down and move the toggle next to Skype to OFF position. After this, Restart your computer and you will no longer find Skype starting automatically and running in background on your computer.
2. Disable Skype Desktop in Windows 10
This popular version of Skype won’t be present on your computer, unless you have downloaded Skype Desktop App on your computer from Microsoft’s Official Download Site. You can follow the steps below to Disable Skype Desktop App and prevent it from starting automatically on your computer.
Open Skype Desktop App on your Computer and Sign-in to your Skype Account (if you are not already signed-in).
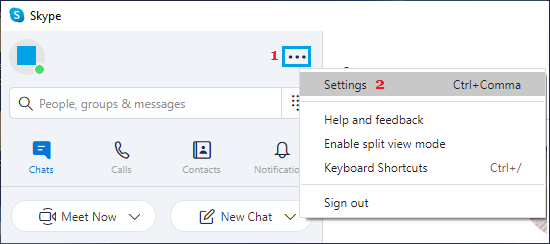
Select More icon and click on Settings in the drop-down menu.
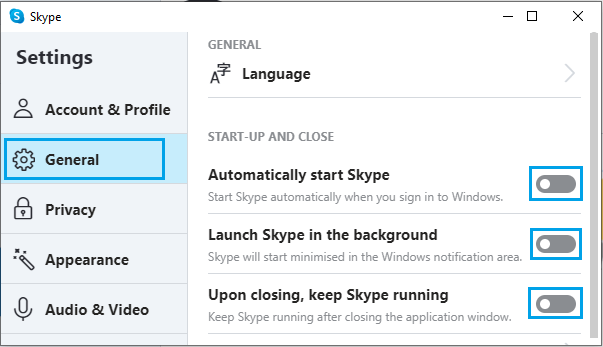
On the Settings screen, disable Automatically Start Skype, Launch Skype in Background and Upon closing, keep Skype running options.
After this you will no longer find Skype Desktop App starting automatically and running in background on your computer.
3. Disable Skype for Business in Windows 10
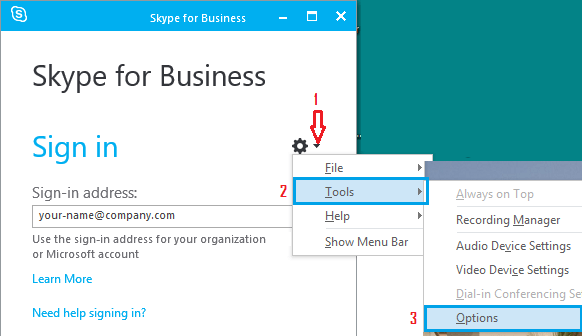
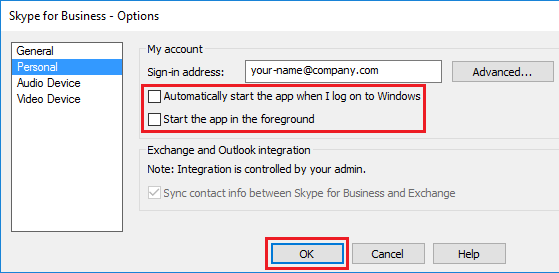
This version of Skype usually comes bundled with certain versions of Microsoft Office and is also known to come pre-loaded on certain New computers. If you are already signed-in to Skype for Business App, you can follow the steps below to disable Skype Business on your Windows 10 computer. Click on Skype Settings icon > select Tools and click on Options in the side-menu.
On options screen, select the Personal tab in the left-pane. In the right-pane, uncheck Automatically Start the App When I log on to Windows and Start the App in the foreground options.
Click on OK to save these settings on your computer. Restart your computer and you will no longer find Skype for Business App bothering you.
4. Disable Skype Preview
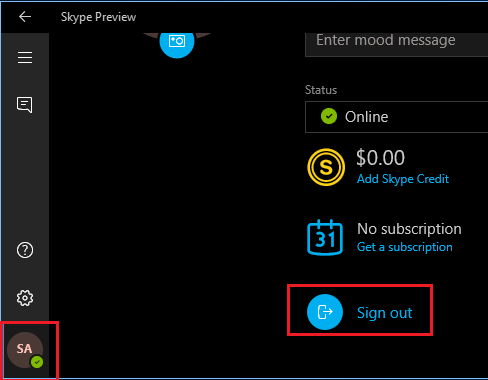
This version of Skype is unlikely to be running on your computer, unless your computer is running on an older version of Windows 10. Open Skype Preview App > click on your Profile icon (bottom-left corner) > scroll down in the right-pane and select the Sign Out option.
After this, you will no longer find Skype Preview starting automatically on your computer and running in background.
How to Uninstall Skype for Business in Windows 10 Stop Microsoft Teams from Running in Background