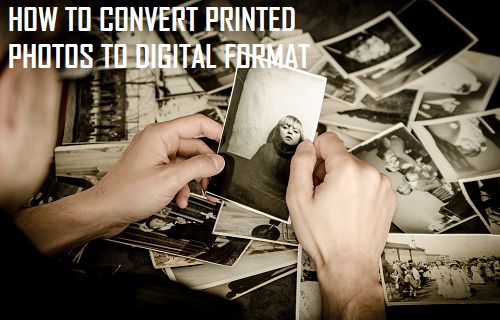
Convert Printed Photos to Digital Format Using Scanner
While there has always been an option to scan printed photos using a scanner, not many people take this route. Buying a good quality scanner is expensive and using the scanner to digitalize old photos is time consuming. However, if you care for memories, you will be willing to spend the time and the money to preserve them. Since there are various types of scanners and scanning software, the steps to scan photos and edit scanned photos can vary. Hence, we are providing below only some broad guidelines for scanning photos, instead of offering step-by-step instructions to scan photos.
- It is important to setup or place your scanner in a dust free environment. 2. Remove dust from old photos by using a clean microfiber cloth.
- Clean the scanner glass using microfiber cloth or an alcohol-based cleaning wipe
- Select a minimum resolution of 300 dpi for scanning 4×6 inch photo prints.
- Choose a higher resolution (600 or 900 dpi), in case you want to be able to enlarge 4×6 inch photos.
- Make use of the Editing options in the scanning software to crop, adjust colour and improve the digital copies
Take Photos of Printed Photos
Another option that is commonly used by many users is to use a Digital Camera or the Rear Camera of an iPhone or Android Phone to take photos of printed photos, in order to produce a digital copy of the printed photos. While this option manages to produce a digital copy of your printed photos, using this option often results in poor quality images with glare and crooked edges.
Outsource Photos For Scanning
In case you do not have the time for scanning hundreds or thousands of printed photos, you can outsource the job to Photo Scanning services like Digital Memories, DigMyPics or EZPhotoScan or find a local scanning service in your area. The advantage with a local scanning service is that job is most likely to be performed by local staff and not outsourced to countries with cheaper labour. Also, you will be able to test the quality of the service by starting with a smaller job.
Use Google’s PhotoScan App to Digitalize Printed Photos
Google’s PhotoScan app automatically crops out photos, rotates and adjusts photos to the best possible orientation using Edge Detection and Perspective Correction Technology. The app also features Anti-glare and Auto-enhancement functions to help produce enhanced digital scans of your printed photos. In general, Google’s PhotoScan App provides better results than taking photos of printed photos or scanning the Photos using an average quality scanner. Google’s PhotoScan app is available for free and can be downloaded on your Android Phone from Google Play Store and on your iPhone or iPad from the App Store.
- Download and install the PhotoScan app on your iPhone or Android Phone. 2. Place the printed photo on a flat surface 3. Open the PhotoScan App on your iPhone or Android Phone. 4. Next, position the Rear Camera of your phone over the printed Photo and tap on the Shutter button.
- You will see four circles appearing on the Photo. 6. Now, move your phone over the first circle and hold it, until the circle is selected. Similarly, move your phone over each of the 3 remaining circles, until they are all selected and filled. As you move your Camera over the 4 dots, the PhotoScan app takes photos of the printed photos and combines these 4 photos into a single Digital Photo. Once you have covered all the four circles, the PhotoScan app will automatically rotate, crop, colour correct the photo and save it to your Phone.